Instagram guides resemble little blog posts directly on Instagram. Similar to a blog article, they let viewers navigate through a
stream of content that has been carefully selected and annotated.
Gift guides, product spotlights, information roundups, faqs, travel advice, restaurant reviews, and many other things can be
curated using them.
How to create one:
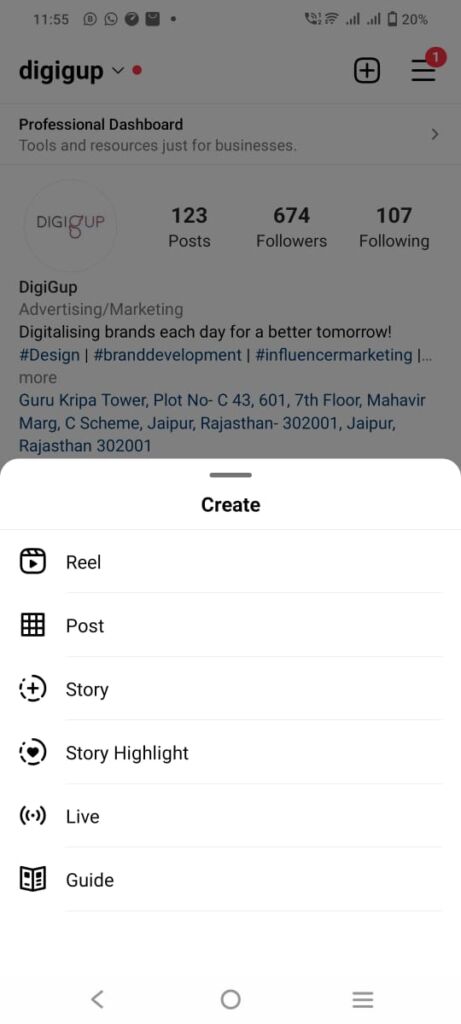
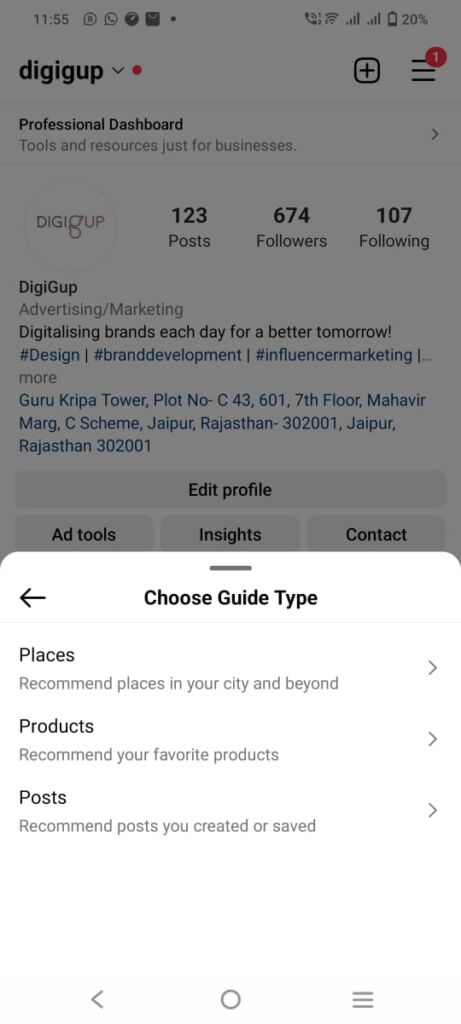
Step 1: set up an Instagram guide

Step 2: adding content to your guide

When choosing posts in any of the guide options below, touch on the thumbnails of the posts you want to include. The corner will display the number you choose in the series. In this order, the posts will be uploaded, with the initial post appearing at the top of the list. Choose the oldest content first if you want your content to appear in chronological order based on the date it was created.
Note: guides can only choose stuff from your feed posts i.e. your pre existing content on instagram (post, reel, igtv) and not from your camera roll or stories.
Step 3: Formatting your guide


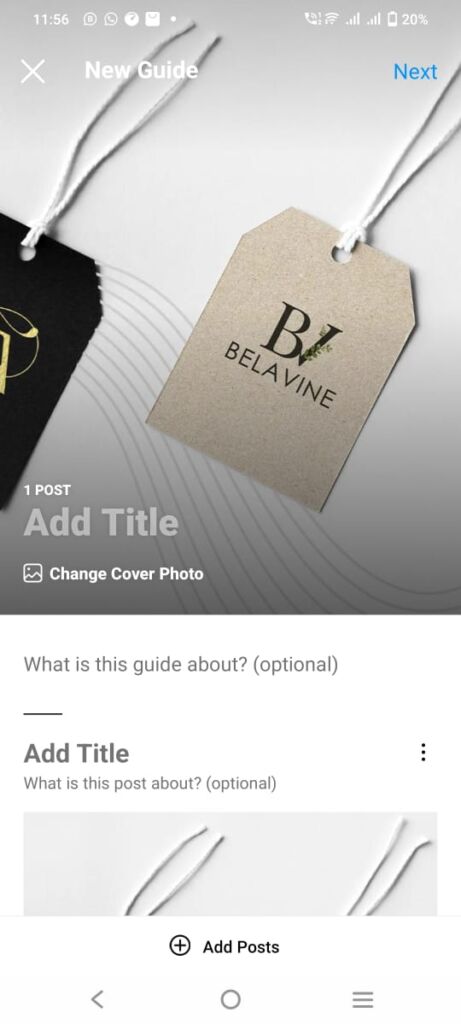
You’ll reach the format page to configure the details for your guide after choosing the material for your guide and selecting next.
Each Instagram guide needs to have a title. If you don’t, you’ll encounter a problem while doing the subsequent step. Use titles that are lucid and brief. If you need more information and context than what is provided in the title, you may describe the “what is this guide about?” area. You can also choose a different cover image for your guide, which you’ll probably want to do.
While the majority of Instagram posts have a 1:1 square format, the guide cover has a 3:4 portrait size and will crop your image appropriately.
Note: the cover picture cannot be moved by dragging.
Instead, you can select any photo from your feed by tapping change cover photo.
Don’t worry; only the cover image will change; the posts in your guide will remain unchanged. Additionally, you cannot upload a custom cover photo; instead, you must select one from your posts or feed.
The next step is to give each post in the guide a title.
You must enter the post’s title and any optional descriptions because the guide won’t automatically pull in any captions or information from the original post.
Step 4: Voila! Your guide is ready!

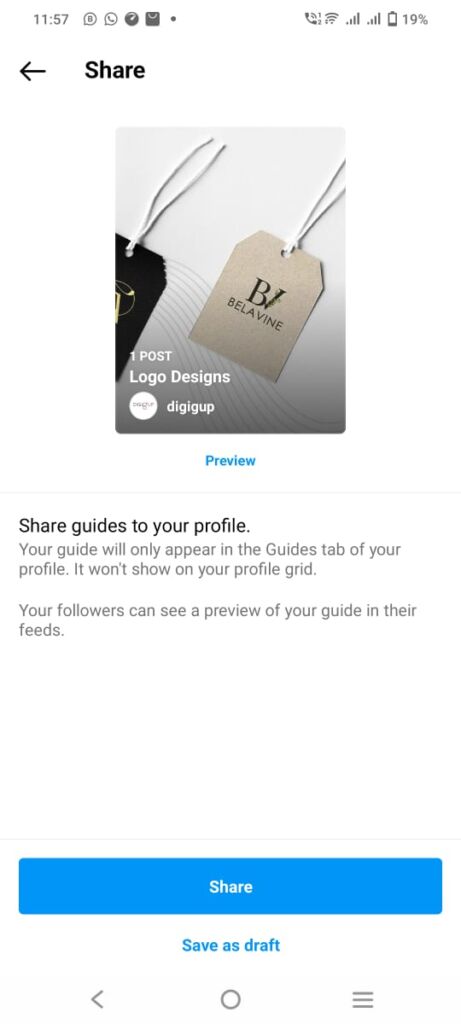
By selecting preview from the share screen’s menu, you can see a preview of your guide.
Tap share when you’re ready to share it. Alternately, select save as draft to return and complete the edits later. The first Instagram guide you create will display the guide icon, which resembles a newspaper, once you tap share (or save as draft) on it. After you post your guide, other people will be able to see it and share it.
Step 5: share, share, share!
You can post it on Instagram either through a direct message (dm) or through your stories.
Additionally, everyone who views your guide may also share it.
Tap on the share icon (the paper airplane icon) in the top-right corner to share a guide—whether it be your own or someone else’s. You can choose to send it via a dm or share it on your story from the pop-up menu. If you share it via a dm, you can add a message to the share to explain why you’re sharing it with that individual or group, just like you can with any other message.
Conclusion:
Instagram guides are a great way to bring your old content to light again, put similar content together or organize and segregate your profile which helps your audience find what they are looking for more smoothly and makes it convenient for you to put out your content and organize it for your viewers on your terms.
